
Whereas previously apparel customization was something that required expertise in tailoring and sewing skills, the process now allows one to easily express themselves through personalized clothing.
- The Initial Stage of Visual Conceptualization
- Translating Pixels into Machine Coordinates
- Selecting the Right Style for Your Brand
- Inside the Factory: Stitching the Design
- Fusing the Heat-Activated Adhesive Foundation
- Finishing the Perimeters with Precision Cutting
- Rigorous Quality Control and Secure Packaging
- Preparing Your Target Garment for Application
- Fusing the Materials for a Permanent Bond
- Securing the Reverse Side and Post-Care Rules
- Ready to Launch Your Custom Patch Project?
Previously, if someone wanted to put a logo, team symbol, or even artistic design on their apparel, they needed to possess some advanced sewing techniques or pay a professional to do it for them.
The reality has changed completely due to the widespread use of heat-applied graphics. Whether we are talking about new brands creating their line or companies trying to optimize uniforms for their employees, there is nothing easier than to add logos and designs with custom iron-on patches onto the fabric using only heat.
The Initial Stage of Visual Conceptualization
The creation process of a truly outstanding symbol always starts in the digital environment by forming a definite visual idea. Designers prefer to create vector illustrations in order to produce graphics characterized by sharp contours, contrasting color schemes, and defined edges.
As the end product is to be created by means of physical threads or other material rather than dots of ink, a different strategy is required. Overly complicated gradient effects, highly detailed photographs, and very small text components are usually simplified in the course of this process.
Translating Pixels into Machine Coordinates
The digital artwork, after being approved finally, is then sent through a complex process of conversion called digitizing for embroidery purposes. It is at this stage when an engineer converts the graphic design into a detailed stitch map, which the machines interpret.
The digitizer maps out how each needle needs to work and what path it must take. They also control the thread density and the pattern of colors as well. The whole process ensures that there are no creases in the fabric while working on the high-speed machines.
Selecting the Right Style for Your Brand
Prior to putting the manufacturing equipment into operation, the creators need to choose which type of patch corresponds to their needs and preferences. Traditionally embroidered patches provide an elegant look using standard threads, while woven options rely on very thin threads to achieve detailed designs and typography.
In the case of those who prefer to have a retro and varsity college feel, along with softness similar to a carpet, custom chenille patches would be a good choice for larger graphics applied to jackets. Every type of patch requires a distinct approach in its manufacturing process.
Inside the Factory: Stitching the Design
In order to better understand the end result, it becomes quite intriguing to lift the veil behind the scenes of the production line and see exactly how are iron on patches made by industrial machines.
The manufacturing process starts by placing the base material, which includes materials such as superior cotton twill and thick felt, onto a very large and automated embroidery frame.
This task is completed by computerized multi-needle machines that work at an astounding rate, completing thousands of stitches within minutes. The advanced machines apply the various colors of thread layer by layer, constructing the design from the bottom up.
Fusing the Heat-Activated Adhesive Foundation
After the entire physical layout has been carefully sewn onto the master fabric material, the emblem then undergoes a very important process that will allow it to be turned into something that can actually be used by people.
In order to manufacture custom iron on patches from the design, a special sheet of dry copolymer plastic adhesive must be put into the back of the sewn fabric. The lamination process employs the use of an industrial heat press that heats up just the top layer of the adhesive, thereby making it bond with the backing of the embroidery.
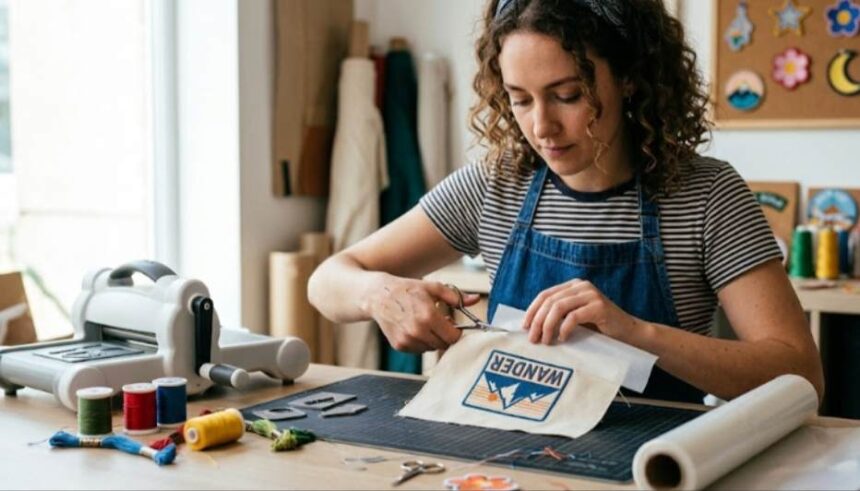
Finishing the Perimeters with Precision Cutting
After being properly bonded to the backing, the master fabric is then sent for cutting and edging processes. For geometrical motifs like circles, ovals, or rectangles, a typical practice includes applying an edging known as a “merrowed edge,” which entails wrapping a thread around the border of the design in order to avoid fraying.
In case the design is highly complex and involves irregular shapes in accordance with the outline of the art piece, a laser cutter, which provides a clean edge while avoiding fraying, is used.
Rigorous Quality Control and Secure Packaging
Prior to dispatching an order out of the factory, every individual item must undergo the rigorous process of quality assurance inspection. Quality control personnel inspect each badge in well-lit areas to trim any small stray threads, ensure that there is absolute precision in color matching, and check whether the back layer is entirely uniform.
Any product that has defects is immediately scrapped from production. The products are counted and packed in moisture-proof packaging after passing the inspection process.
Preparing Your Target Garment for Application
Upon delivery of the package, proper completion of the application process becomes absolutely necessary for obtaining a permanent bond. Begin by assessing the fabric components of the item you wish to apply your design on. Materials such as thick cottons, jeans, wool flannel, and tough canvases work best because they can handle higher temperatures without melting or becoming deformed.
Do not attempt to sew designs onto materials such as nylon, silk, or polyester that could be damaged by heat. Preheat your home iron to maximum cotton temperature settings and switch off the steam feature.
Fusing the Materials for a Permanent Bond
Ensure that the article is placed on a hard and heat-proof surface; after that, you need to pre-iron the desired spot to remove any wrinkles or moisture from the material. The patch should be placed at the right spot, and then the pressing cloth (cotton pillowcase or parchment paper) needs to be used to cover the thread.
The iron needs to be kept straightly on the patch with a considerable amount of downward force for about 25-30 seconds. It is important not to slide the iron across the material, as it could move the patch.
Securing the Reverse Side and Post-Care Rules
To ensure a secure mechanical bond, flip the item totally inside out when it is still warm and press the hot iron on the reverse side of the application zone for another 15 seconds. The second pressing will make sure that the adhesive penetrates deeper into the weave of the clothing fibers.
Leave the garment lying down and allow it to cool down for 15 minutes. In cases where the clothing will be washed frequently in the machine, a quick sewing along the edges will act as a foolproof safeguard against lifting of the edges.
Ready to Launch Your Custom Patch Project?
From the original digital creation process to finally using an at-home iron to finish the creation, the process of designing a custom logo is the perfect middle ground between mass-production processes and personal artistry.
Using a decorative technique that eliminates the necessity of having any kind of specialized skill in terms of sewing, you can easily take a blank t-shirt and turn it into an exclusive piece of clothing.
There is no need to keep your exclusive designs confined within a digital file when you can use your imagination to create a masterpiece that boasts impressive physical proportions.